Weact ePaper with CircuitPython
Learn to integrate WeAct ePaper with CircuitPython. Display text easily with this step-by-step tutorial.
Jan. 12, 2026

If you are looking for a low-power, high-readability solution for your IoT projects, ePaper (or E-Ink) displays are the ideal choice. In this tutorial, we will explore how to connect and program the WeAct Studio ePaper 2.13" (tricolor version: Red, Black, and White) using a Raspberry Pi Pico and CircuitPython.
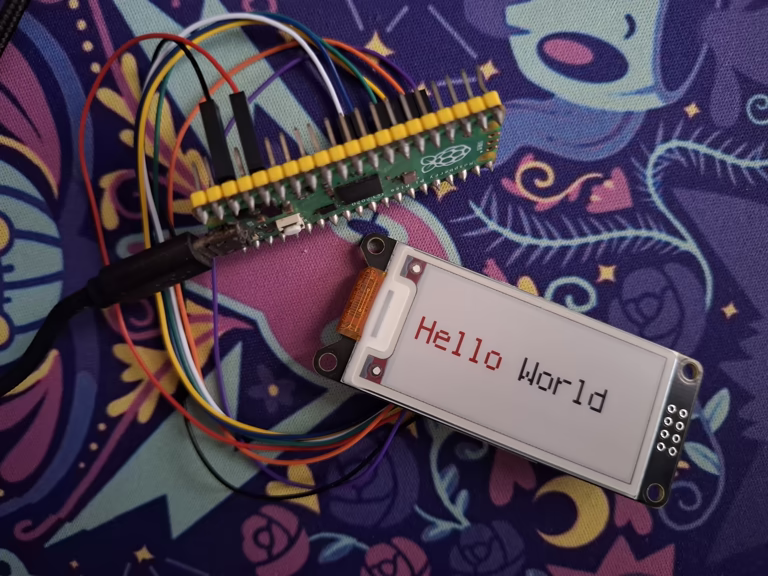
The final goal is to display a classic colorful "Hello World" on the screen. Let's go!
Requirements
Before starting, make sure you have the following items and tools installed:
- Hardware:
- WeAct Studio ePaper 2.13" (Version B - Tricolor).
- Raspberry Pi Pico (or any CircuitPython-compatible board with SPI support).
- Software:
- Python installed on your computer.
circup: CircuitPython library manager.mpremote: Tool to interact with the microcontroller via command line.
Pinout (Hardware)
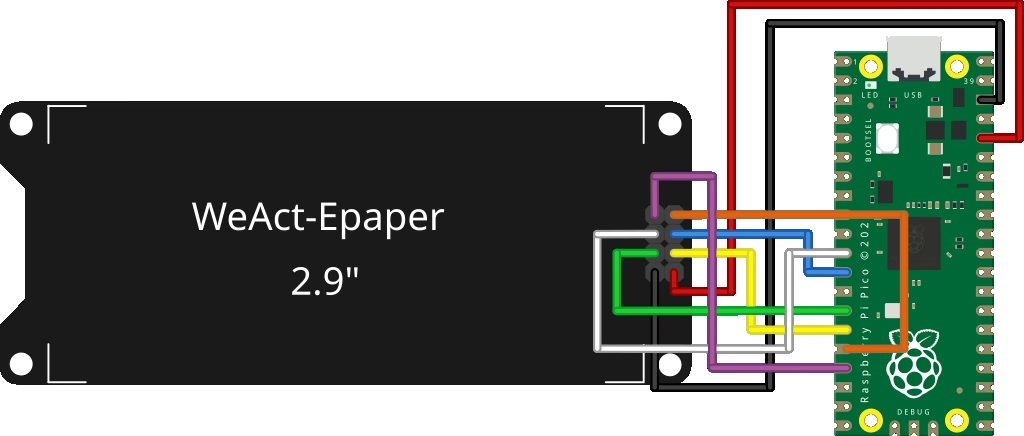
Communication between the Pico and the display happens via the SPI protocol. Below, I detail how you should connect the WeAct module wires to the Raspberry Pi Pico pins, based on the code we will use.
| WeAct ePaper Pin | Function | Raspberry Pi Pico Pin | Code (Board) |
| VCC | Power (3.3V) | 3V3(OUT) | - |
| GND | Ground | GND | - |
| SCL | Clock SPI | GP10 | board.GP10 |
| SDA | Data (MOSI) | GP11 | board.GP11 |
| CS | Chip Select | GP9 | board.GP9 |
| DC | Data/Command | GP8 | board.GP8 |
| RES | Reset | GP12 | board.GP12 |
| BUSY | Busy Status | GP13 | board.GP13 |
Note: Ensure your board is disconnected from power while making connections.
Installing Libraries
With CircuitPython already installed on your Pico, we need to add the necessary drivers. The driver for this specific display is SSD1680. In addition to it, we need the text library.
Connect the Pico to USB and execute the following command in your terminal:
circup install adafruit_ssd1680 adafruit_display_textThis will automatically download and copy the dependencies to the lib folder of your device.
The Code (main.py)
Create a file named main.py and paste the code below. It configures the SPI bus, initializes the display, and draws text on the screen.
import board
import busio
import displayio
import terminalio
import adafruit_ssd1680
import fourwire
from adafruit_display_text import label

displayio.release_displays()

spi = busio.SPI(clock=board.GP10, MOSI=board.GP11)
epd_cs = board.GP9
epd_dc = board.GP8
epd_reset = board.GP12
epd_busy = board.GP13

display_bus = fourwire.FourWire(
    spi, command=epd_dc, chip_select=epd_cs, reset=epd_reset, baudrate=1000000
)

display = adafruit_ssd1680.SSD1680(
    display_bus,
    width=250,
    height=122,
    rotation=270,
    busy_pin=epd_busy,
    seconds_per_frame=1.0,
    highlight_color=0xFF0000
)

g = displayio.Group()

bg_bitmap = displayio.Bitmap(display.width, display.height, 1)
palette = displayio.Palette(1)
palette[0] = 0xFFFFFF
bg_sprite = displayio.TileGrid(bg_bitmap, pixel_shader=palette, x=0, y=0)
g.append(bg_sprite)

text_hello = label.Label(
    terminalio.FONT, text="Hello ", color=0xFF0000, scale=3, x=10, y=60
)
g.append(text_hello)

text_world = label.Label(
    terminalio.FONT, text="World", color=0x000000, scale=3, x=118, y=60
)
g.append(text_world)

display.root_group = g
display.refresh()
Understanding the Code
Let's break down the script's operation to understand what is happening "behind the scenes":
- Hardware Configuration: First, we define the SPI and control pins (
CS,DC,RESET,BUSY). Thedisplay_busobject uses theFourWireclass to manage data communication with the screen. - The SSD1680 Driver: Here we instantiate the
SSD1680class. Note the important parameters:width=250andheight=122: Specific resolution for this 2.13" model.highlight_color=0xFF0000: This instructs the driver that the third available color is Red. If you have the yellow version, the hex code would change, but the logic remains the same.
- Screen Background: Unlike OLED or LCD displays, on ePaper we need to explicitly draw the background. We create a
Bitmapthe size of the screen and set its color in thePaletteto white (0xFFFFFF). - Drawing Text: We use the
labellibrary to create text objects.- Hello: We set the color
0xFF0000(Red) and 3x scale. - World: We set the color
0x000000(Black), also at 3x scale. - The position
(x, y)defines where the text starts.
- Hello: We set the color
- Refresh: The command
display.refresh()sends the image buffer to the ePaper. Remember: ePaper screens take a few seconds to update (blinking black/white/red) to arrange the electronic ink particles.
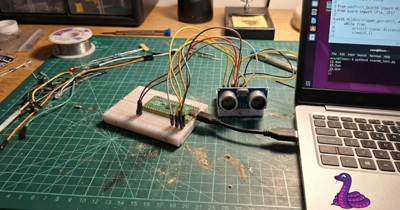
Running the Project
With the hardware connected and the code saved, open your terminal and use mpremote to run the script directly on the Pico:
mpremote run main.pyWatch your WeAct screen. It will start blinking and update with the final text.
Final Result
If everything went well, this should be the result on your display: